Modding Trolddom: Getting Started
The possibility of modifying Trolddom has been around since the start, but it has been quite an obscure feature. Recently some players have been trying their luck with it, so I decided it was time to streamline the procedure a bit. Patch 1.0.12 hopefully makes everything a bit simpler. This blog post is the first in a series where I try to show how things in the game can be changed.
Note from the future:
tpublic-util.exeis no longer included when you get Trolddom on Steam. Apparently it triggered some people’s overly zealous anti-virus programs. I’ve updated this post accordingly.
What do I need?⌗
- A copy of Trolddom for the binary data to extend.
- git for the source data that you can modify. If you’ve never heard about git you probably need to do a quick google about it before continuing. I’m going to assume that you’re using a command prompt for this, but you could obviously do everything in a GUI if you wanted to.
- Download
tpublic-util.exethat matches your version of Trolddom from https://github.com/demogorgon1/trolddom-public/releases. Be careful that you always have the correct version of the utility. Backward or forward compatibility is not guaranteed.
Getting the public repository⌗
-
Open a command prompt.
-
Find a suitable place where you want to create your work files. For example
C:\gitor something like that. Enter that directory in your command prompt. -
Clone the repository:
git clone --single-branch --branch live https://github.com/demogorgon1/trolddom-public.git
It should output something like this:

Note that this clones the live branch which corresponds to the version of Trolddom that is currently online.
What do I do when there is a new version of Trolddom?⌗
Do a git pull in your cloned repository to get the latest source data. If you have a bunch of local changes you might need to stash them first (again, ask google for help if needed). Download the matching tpublic-util.exe released on the github page of the repository.
Building the data⌗
Congratulations, now you have all the Trolddom source data, but in order for the game to use it, you need to perform a data build. Basically, the source data is a bunch of assorted files, mostly text files
and image files that define everything in the game, and we need to transform these into a more compact form used by the game. All this source data is in the data directory in the git repository.
-
Enter the
trolddom-publicrepository with your command prompt. -
Figure out where the build tool (
tpublic-util.exe) you downloaded from github is. Let’s assume that you put it in the root of the repository, but obviously you could put it anywhere. -
Run the tool in the root of the repository:
tpublic-util.exe data -ids _ids.txt -base "c:\Program Files (x86)\Steam\steamapps\common\Trolddom"
Let’s dissect it a bit:
tpublic-util.exe <source path> -ids <path to _ids.txt> -base <game install directory>
The source path points to where your input data is. Note that you can have multiple source paths if you want to. The _ids.txt file is the persistent id table, more on that later, and finally it needs to read some data from your game install directory, because not everything is included in the public git repository. Basically, it will take whatever is in the install directory and overwrite it with whatever is defined by the data source.
If you don’t specify the output directory with -output <path>, it will create directory named custom in your current directory. If you followed the instructions above it should be located inside your
cloned git repository.
In your output directory, you’ll find a few files. manifest.bin and sprites.bin are the ones that matter.
Starting the game with your custom data⌗
You need to start the game with -custom <path to your output directory> and that should be it. You can either put this command line argument in Steam or you can create a shortcut to trolddom.exe somewhere and
add the command line argument there. Make sure the game runs in the original install directory.
Note that nothing interesting is happening when you start the game. It’s completely vanilla as your custom data build is exactly the same as the normal one.
If you actually make changes, you should use either offline mode or connect to a custom server that has been started with the same -custom command line argument. If you connect to the official server (which will have different data) your client will probably end up crashing. If you’re confusing the server with your custom data it will just kick you.
Making changes⌗
Right, it’s a bit boring to just build your data and then nothing happens. Let’s change something. How about turning the peaceful starting area pigs into vicious monsters?
Open up data\maps\open-world\wildlife.txt in your favorite text editor. Somewhere in there you’ll find the definition of the entity we’re looking for:
entity .boar_1: !NPC
{
	_string: "Boar"
	_level: 1
	_faction: wildlife
	_sprite: boar
	_sprite_dead: boar_dead
	_weapon_damage: 1
	_resource_health: 1
	_loot_table: .boar
	_creature_type: beast
	_default_behavior_state: .wildlife
}
What you see here is a definition of an entity data type. entity indicates the type of data we’re defining, .boar_1 is the identifier and !NPC is a macro that defines an NPC entity. I don’t want to delve too much into the details here, but most of the things you interact with in the game world are entities. NPCs are a sub-type of entities that include both friendly quest givers and monsters.
First of all, if we want to make these nice pigs more vicious, we can change _faction from wildlife (a neutral faction) to monsters (a generic monster faction that will attack on sight). We can also change _weapon_damage from 1 to 1.5. This indicates their attack damage compared to the baseline NPC of that level. In other words, this will cause the pig to do 50% more damage than usual. The !NPC macro will just give the NPC a default attack if nothing is specified, so let’s make it a bit more vicious than that. _abilities specifies a prioritized list of abilities that the NPC should try to use in combat. The default looks like this:
_abilities:
[
	{ id: npc_attack }
]
We’ll add another entry that will trigger the npc_frenzy ability when the NPC has less than 50% health:
_abilities:
[
	{ id: npc_frenzy target: self requirement self<must_have_less_health_than>: 50 }
	{ id: npc_attack }
]
With all our changes, the entity definition now looks like this:
entity .boar_1: !NPC
{
	_string: "Boar"
	_level: 1
	_faction: monsters
	_sprite: boar
	_sprite_dead: boar_dead
	_weapon_damage: 1.5
	_resource_health: 1
	_loot_table: .boar
	_creature_type: beast
	_default_behavior_state: .wildlife
	_abilities:
	[
		{ id: npc_frenzy target: self requirement self<must_have_less_health_than>: 50 }
		{ id: npc_attack }
	]
}
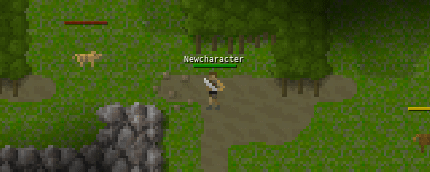
Run tpublic-util like you did earlier and start the game with -custom <path to your custom data>. Enter offline mode, create a new character, and go get murdered by a frenzied pig.
The persistent id table⌗
Ah, shouldn’t forget about the _ids.txt file, the persistent id table. Notice how things in the data definitions are referenced by identifiers like .boar_1, npc_attack, and so on? The persistent id table
translates these into small integer ids that are more efficient for saving in databases, transferring over the network, and just generally more convenient to deal with in general. For example, npc_attack is translated to 36. That’s all great, but the problem is that we need to keep track of this somehow, because everyone needs to agree that 36 means npc_attack. This mapping needs to be persistent and always the same.
Whenever the data build happens it will automatically update _ids.txt with new identifiers that are encountered. It will assign new integer numbers to these. This means that if multiple people are working on this in parallel, they’re likely to come up with conflicting mappings.
The _ids.txt file found in the git repository is the official one for Trolddom and is updated whenever I make official builds. If you make something you want included in the game, just submit a pull request on github. Don’t include your updated _ids.txt in the pull request.
More to come⌗
Stay tuned for more posts in this series that will dig deeper into the undocumented horrors of the Trolddom data files.